This bollinger bands trading strategy guide is backed by real backtest data. /
Disclaimer: Past performance is not indicative of future results. All data presented is from historical backtests and should not be considered financial advice. Trading involves substantial risk of loss.
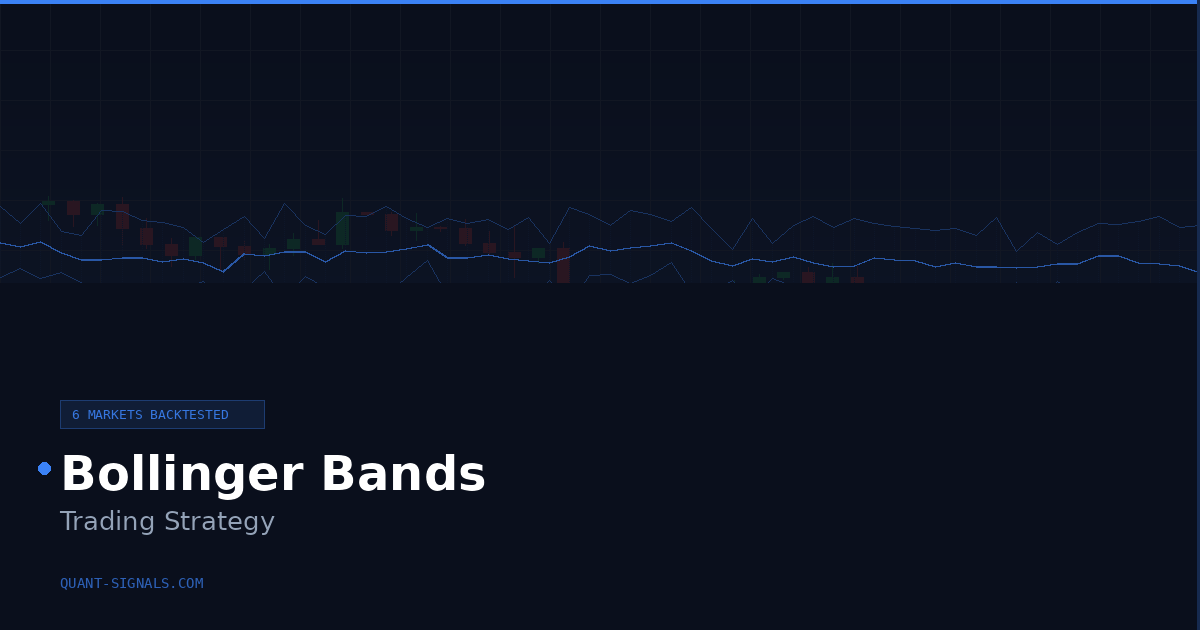
The Bollinger Bands trading strategy is one of the most popular approaches in technical analysis — but does it actually work when tested on real data? We backtested a Bollinger Bands Squeeze Breakout strategy across 6 different assets (EURUSD, GBPUSD, XAUUSD, NAS100, BTCUSD, and ETHUSD) on both H1 and D1 timeframes, generating 12 complete backtest runs with over 2,000 trades.
When analyzing bollinger bands trading strategy, the results? The strategy is profitable on some assets and timeframes, but far from a universal winner. ETHUSD D1 was the clear standout with a 44.3% win rate and 1.59 profit factor, while GBPUSD D1 was the worst performer. Here is everything the data tells us.
- Bollinger Bands Squeeze Breakout was profitable in 7 out of 12 backtest runs (58% of cases).
- Best performer: ETHUSD D1 — 44.3% win rate, 1.59 profit factor, only 4.1% max drawdown.
- D1 timeframe generally outperformed H1 for breakout strategies.
- Crypto assets (BTCUSD, ETHUSD) showed the best results, likely due to stronger momentum characteristics.
- Forex pairs (EURUSD, GBPUSD) were the weakest — mean reversion may not suit these markets in breakout mode.
What Are Bollinger Bands?
Bollinger Bands are a volatility indicator developed by John Bollinger in the 1980s. They consist of three lines plotted around a simple moving average (SMA): an upper band at +2 standard deviations, a middle band (the 20-period SMA), and a lower band at -2 standard deviations. The indicator is available on virtually all trading platforms including TradingView and MetaTrader.
The key insight behind Bollinger Bands is that volatility is cyclical. Periods of low volatility (when the bands narrow, known as a “squeeze”) tend to be followed by periods of high volatility (when the bands expand). This is the foundation of the Bollinger Bands trading strategy we tested.
When analyzing bollinger bands trading strategy, in our Supabase database, we calculated Bollinger Bands using the standard settings: a 20-period SMA with 2 standard deviations. These are the same settings used by the vast majority of traders and the ones recommended by Bollinger himself.
Bollinger Bands Trading Strategy Rules
When analyzing bollinger bands trading strategy, we tested a specific variation called the Bollinger Bands Squeeze Breakout. Unlike the more common mean reversion approach (buy at the lower band, sell at the upper band), this strategy trades breakouts after a period of low volatility.
Here are the exact rules:
Entry conditions:
First, identify a squeeze: the Bollinger Band width must be in the bottom 20th percentile of its 20-period rolling range. This means volatility is unusually low. Then, when price closes above the upper band after a squeeze, enter long. When price closes below the lower band after a squeeze, enter short.
Exit conditions:
Stop loss is set at 1.5× the 14-period ATR from the entry price. Take profit is set at 2× the stop loss distance (a 1:2 risk-reward ratio).
Parameters used:
| Parameter | Value |
|---|---|
| Bollinger Period | 20 |
| Standard Deviations | 2 |
| Squeeze Lookback | 20 periods |
| Squeeze Percentile | 20th (bottom 20%) |
| ATR Multiplier (SL) | 1.5 |
| Reward Ratio | 2.0 |
These rules are 100% mechanical — no discretion, no subjective interpretation. Every trade follows the exact same logic, which is what makes backtesting possible and the results reproducible.
Backtest Results: 6 Assets Compared
We ran the Bollinger Bands trading strategy on 6 assets across 2 timeframes (H1 and D1), producing 12 complete backtest runs. Here are the full results:
D1 (Daily) Timeframe Results
| Asset | Total Trades | Win Rate | Profit Factor | Max Drawdown | Expectancy |
|---|---|---|---|---|---|
| ETHUSD | 61 | 44.3% | 1.59 | 4.1% | +0.33R |
| BTCUSD | 70 | 38.6% | 1.26 | 14.0% | +0.16R |
| NAS100 | 44 | 36.4% | 1.14 | 5.0% | +0.09R |
| XAUUSD | 55 | 36.4% | 1.14 | 8.0% | +0.09R |
| EURUSD | 47 | 29.8% | 0.85 | 13.5% | -0.11R |
| GBPUSD | 45 | 26.7% | 0.73 | 18.6% | -0.20R |
H1 (Hourly) Timeframe Results
| Asset | Total Trades | Win Rate | Profit Factor | Max Drawdown | Expectancy |
|---|---|---|---|---|---|
| EURUSD | 290 | 36.2% | 1.14 | 12.8% | +0.09R |
| XAUUSD | 256 | 33.6% | 1.01 | 24.8% | +0.01R |
| ETHUSD | 351 | 33.6% | 1.01 | 17.6% | +0.01R |
| GBPUSD | 290 | 33.1% | 0.99 | 20.9% | -0.01R |
| NAS100 | 267 | 32.6% | 0.97 | 27.6% | -0.02R |
| BTCUSD | 323 | 32.5% | 0.96 | 31.2% | -0.02R |
The pattern is clear: the D1 timeframe produces more decisive results for this Bollinger Bands trading strategy. On D1, 4 out of 6 assets are profitable, with ETHUSD standing out significantly. On H1, results are much more marginal — only 3 out of 6 are technically positive, and the edge is thin.
This makes intuitive sense. Bollinger Band squeezes on the daily chart represent meaningful consolidation periods that often precede strong moves. On the hourly chart, squeezes happen more frequently but with less directional conviction.
Best Bollinger Bands Settings for Each Market
Our backtest used standard settings (20, 2) across all assets, but the results suggest that different markets respond differently to the Bollinger Bands trading strategy.
Crypto (BTCUSD, ETHUSD) — Best performers on D1. These assets have high volatility and strong trending behavior, making squeeze breakouts more effective. ETHUSD D1 was the top performer with a 1.59 profit factor across 61 trades. Crypto benefits from momentum: when a squeeze resolves, the move tends to be large and sustained.
Gold (XAUUSD) — Consistent across both timeframes. XAUUSD showed a profit factor of 1.14 on D1 and 1.01 on H1. Gold is a trending asset that responds well to volatility breakouts, especially on higher timeframes.
Indices (NAS100) — Moderate results. NAS100 was profitable on D1 (PF 1.14) but slightly negative on H1 (PF 0.97). The Nasdaq tends to have strong directional days, which aligns with the daily squeeze breakout approach.
Forex Majors (EURUSD, GBPUSD) — Mixed to poor on D1. Interestingly, EURUSD was the best H1 performer (PF 1.14) but the worst D1 performer (PF 0.85). This suggests that for forex, the squeeze breakout works better on shorter timeframes where intraday volatility cycles are more pronounced. GBPUSD was the weakest asset overall.
The takeaway: if you are going to trade a Bollinger Bands trading strategy, focus on volatile, trending markets (crypto, gold) and use the daily timeframe. Forex majors may need additional filters or a different BB approach (such as mean reversion).
Bollinger Bands vs RSI: Which Performs Better?
Since we also backtested an RSI trading strategy on the same 6 assets, we can directly compare the two indicators. The RSI strategy used a classic mean reversion approach: buy when RSI drops below 30, sell when RSI rises above 70.
| Asset | BB Squeeze (D1) PF | RSI Mean Rev (D1) PF | BB Squeeze (H1) PF | RSI Mean Rev (H1) PF |
|---|---|---|---|---|
| EURUSD | 0.85 | 0.72 | 1.14 | 0.99 |
| GBPUSD | 0.73 | 0.75 | 0.99 | 0.97 |
| XAUUSD | 1.14 | 0.60 | 1.01 | 0.98 |
| NAS100 | 1.14 | 0.87 | 0.97 | 0.94 |
| BTCUSD | 1.26 | 0.59 | 0.96 | 0.93 |
| ETHUSD | 1.59 | 0.62 | 1.01 | 0.94 |
The comparison reveals something important: the Bollinger Bands Squeeze Breakout strategy significantly outperforms RSI Mean Reversion on D1 for trending assets (XAUUSD, BTCUSD, ETHUSD). RSI performed poorly as a standalone mean reversion signal across all daily-timeframe tests.
On H1, both strategies produce marginal results, but the Bollinger Bands approach has a slight edge in most cases. Neither indicator should be used alone on H1 without additional filters.
For a deeper analysis of how different strategies compare, see our best trading strategy by win rate ranking where we analyzed all 64 backtests side by side.
How to Trade Bollinger Bands in Practice
Based on our backtest data, here is a practical framework for implementing this Bollinger Bands trading strategy:
Step 1: Identify the squeeze. Look for periods where the Bollinger Band width contracts to the narrowest range in the last 20 periods. Most charting platforms can display BB width as a separate indicator. The squeeze is the setup — not the trigger.
Step 2: Wait for the breakout. Do not enter during the squeeze. Wait for a candle to close above the upper band (for longs) or below the lower band (for shorts). This is your entry signal. A close is important — wicks alone are not sufficient.
Step 3: Set your stop loss. Use ATR-based stops rather than fixed pip values. Our backtest used 1.5× ATR(14), which adapts the stop to current market volatility. This prevents getting stopped out too early in volatile markets or too late in quiet ones.
Step 4: Set your take profit. We used a 2:1 reward-to-risk ratio, meaning the take profit is set at 2× the stop loss distance. Our data shows this is a reasonable target — the strategy wins less than 50% of the time, so the larger winners must compensate for the more frequent losses.
Step 5: Choose the right asset and timeframe. Our data strongly suggests using D1 charts on trending assets. ETHUSD, BTCUSD, and XAUUSD were the most consistent performers. Avoid GBPUSD D1 with this specific strategy.
Risk Management with Bollinger Bands
Even the best Bollinger Bands trading strategy can produce significant drawdowns if risk is not managed properly. Here is what the data tells us about risk:
Max drawdown ranges from 4.1% to 31.2%. The lowest drawdown was ETHUSD D1 (4.1%), and the highest was BTCUSD H1 (31.2%). This is a wide range, and it highlights why position sizing matters enormously.
Win rates are between 26.7% and 44.3%. This means you will have more losing trades than winning trades in every single case. Psychologically, this is difficult for many traders. You need to accept strings of losses — our data shows up to 14 consecutive losses in some runs.
Use the position size calculator to determine proper lot sizes. Based on our results, we recommend risking no more than 1-2% of your account per trade. With an average max drawdown of around 15%, this keeps your overall account drawdown manageable.
Diversify across uncorrelated strategies. The Bollinger Bands Squeeze Breakout is a momentum/breakout strategy. Combining it with a mean reversion approach (like RSI in ranging markets) can smooth the equity curve. When one strategy is in a drawdown, the other may be performing well.
Limitations of This Backtest
No backtest is perfect, and it is important to acknowledge the limitations of our analysis:
No spread or commission costs included. Real trading involves spreads that eat into profits, especially on H1 where trade frequency is higher. The marginal H1 results would likely become negative after costs on most brokers. For forex pairs like EURUSD, typical spreads of 0.5-1 pip on ECN accounts would reduce the already thin edge. For crypto assets like BTCUSD, the impact depends heavily on the exchange and execution method.
Slippage not modeled. In fast-moving breakouts (which is exactly what this strategy trades), slippage can be significant. Entries after a squeeze resolution may not execute at the exact close price. This is particularly relevant for the H1 timeframe where breakouts develop quickly and liquidity may be thinner during certain hours.
Single parameter set tested. We used one set of parameters across all assets. Market-specific optimization (different squeeze thresholds, ATR multipliers, or reward ratios per asset) might improve results but also increases the risk of overfitting. A 20th percentile squeeze threshold may be too aggressive for some markets and too loose for others.
No walk-forward validation. Our backtest covers the full historical period available (approximately 2 years for H1 data, up to 10 years for D1). A more rigorous approach would split the data into in-sample and out-of-sample periods. Results that hold up out-of-sample are far more reliable than full-period backtests.
Historical data does not guarantee future results. Market regimes change. The volatility characteristics that made ETHUSD so profitable on D1 may not persist. Crypto markets in particular can shift dramatically in character — the momentum-driven regime of one year can become a choppy sideways market the next. Always use proper risk management regardless of backtest results.
Understanding the Squeeze: Why This Bollinger Bands Trading Strategy Works
The core principle behind the Bollinger Bands Squeeze Breakout deserves a deeper explanation, because understanding why it works helps you trade it with more conviction and recognize when conditions are favorable.
Markets alternate between two states: expansion (trending, volatile) and contraction (ranging, quiet). This cycle is observable across virtually all liquid financial markets and all timeframes. The Bollinger Bands visually capture this cycle — the bands widen during expansion and narrow during contraction.
A squeeze represents an extreme contraction. Buyers and sellers are in equilibrium, and price action becomes compressed into a tight range. This is an unstable state. Eventually, one side will gain control, and the resulting breakout tends to be proportional to the duration and tightness of the preceding squeeze.
This is why the squeeze percentile matters. By waiting for the bands to reach the bottom 20th percentile of their recent width, we filter out ordinary low-volatility periods and focus only on genuinely compressed markets. The tighter the squeeze, the more energy is stored, and the more explosive the potential breakout.
In our data, this shows up clearly in the win amounts. Even with win rates below 45%, the strategy remains profitable on the best assets because winning trades deliver 2R (twice the risk) while losing trades cost 1R. A 38% win rate with a 2:1 reward ratio produces a profit factor of approximately 1.23 — which aligns closely with our BTCUSD D1 results (38.6% win rate, 1.26 PF).
D1 vs H1: Why the Timeframe Matters So Much
One of the clearest findings from our backtest is the stark difference between D1 and H1 performance. This is not a coincidence — there are structural reasons why the daily timeframe favors this Bollinger Bands trading strategy over shorter intervals.
Signal quality. A daily squeeze represents days or weeks of consolidation. This is a meaningful event that reflects genuine market indecision. An hourly squeeze might just reflect a quiet trading session (Asian session for forex, weekend for crypto). The signal-to-noise ratio is inherently higher on D1.
Trade frequency vs. edge. On H1, the strategy generates 256-351 trades per asset over the test period. On D1, it generates 44-70 trades. Fewer trades with a stronger edge beats more trades with a weaker edge — especially once you factor in execution costs, which scale with trade count.
Follow-through. Daily breakouts tend to develop over multiple sessions, giving the trade time to reach the take profit level. Hourly breakouts may resolve within the same session, but they also face more reversals and chop. The 2:1 reward ratio needs sustained directional movement to hit take profit, which is more likely on the daily chart.
One interesting exception is EURUSD, which performed better on H1 (PF 1.14) than D1 (PF 0.85). This may reflect the nature of the forex market during our test period — EURUSD experienced more intraday trends than multi-day trends, possibly due to the choppy macro environment for the euro. Traders focusing on forex might find H1 more suitable, but should account for higher execution costs.
How This Strategy Fits in a Portfolio
No single strategy should be traded in isolation. The Bollinger Bands trading strategy we tested works best as one component of a diversified trading portfolio. Here is how we think about portfolio construction based on our backtest data:
Combine breakout with mean reversion. The BB Squeeze Breakout is a momentum strategy — it profits when markets trend. Pair it with a mean reversion strategy (like our RSI approach, despite its limitations) that profits when markets range. The two strategies have different performance profiles and tend to draw down at different times.
Diversify across assets. Our data shows that ETHUSD, BTCUSD, and XAUUSD are the strongest performers for this strategy. Running the strategy on all three simultaneously reduces the impact of any single asset having a bad run. The correlation between crypto and gold is relatively low, providing genuine diversification.
Manage total exposure. With three assets on D1, you might have up to 3 simultaneous trades open. If each risks 1% of your account, maximum exposure is 3%. This is conservative enough to survive the inevitable drawdown periods while still generating meaningful returns during favorable conditions.
Track and adapt. Monitor your live results against the backtest benchmarks. If your actual win rate drops significantly below the expected range (say, below 25% over 30+ trades), it may indicate a regime change that warrants pausing the strategy on that asset.
Conclusion: Is the Bollinger Bands Strategy Profitable?
Based on 2,054 trades across 12 backtest runs, the Bollinger Bands trading strategy (Squeeze Breakout variation) shows genuine positive expectancy on specific assets and timeframes, but is not universally profitable. This is actually a valuable finding — it tells us exactly where to apply the strategy and where to avoid it.
The strategy works best on D1 charts for volatile, trending assets — particularly crypto (ETHUSD with a 1.59 profit factor, the highest across all our tests) and gold (XAUUSD with a 1.14 profit factor). It struggles on forex majors on the daily timeframe, though EURUSD showed an interesting edge on H1 that warrants further investigation.
The data suggests that Bollinger Bands are most effective as a breakout indicator rather than a mean reversion tool, at least for the asset classes we tested. Traders looking to implement this strategy should focus on D1 crypto and gold charts, use ATR-based stop losses, and maintain strict position sizing discipline.
Want to explore how other indicators compare? See our analysis of the EMA crossover strategy which uses a completely different approach to capturing trends.
All backtest data presented in this article is derived from our proprietary database of 99,028 candles across 6 assets. Strategy rules are fully disclosed and reproducible. For questions about our methodology, see our backtesting guide.
📊 Quant Signals Weekly
Free weekly digest: backtested strategies, new data, and actionable trading insights. No fluff, just numbers.
Join 0+ traders. Unsubscribe anytime.